
Connect
Top 5 Tips for Installing KR615 Car Stereo: A Complete Guide

Introduction
Installing a car stereo might seem like a daunting task, but with the right tools and knowledge, it can be a straightforward process. The KR615 car stereo is a popular choice for many vehicles due to its advanced features and easy installation process. In this guide, we will walk you through the top 5 tips for installing the KR615 car stereo to help you enjoy seamless audio experience in your vehicle.
Tip 1: Gather the Necessary Tools
Before starting the installation process, make sure you have all the necessary tools at hand. This includes a set of screwdrivers, wire cutters, electrical tape, and a wire stripper. Additionally, it is essential to have a wiring harness adapter and a dash kit that is compatible with your vehicle’s make and model. These tools will ensure that the installation process goes smoothly without any hiccups.
Tip 2: Disconnect the Battery
Safety should always be a priority when working with car electronics. Before starting the installation process, make sure to disconnect the negative terminal of the car battery. This will prevent any electrical mishaps and ensure that you can work on the car stereo installation without any risks.
Tip 3: Remove the Old Stereo
To install the KR615 car stereo, you will first need to remove the old stereo from your vehicle. Start by carefully prying off the trim pieces around the stereo using a trim removal tool. Once the trim pieces are removed, unscrew the bolts holding the old stereo in place and gently pull it out. Be mindful of any connected wires at the back of the stereo and disconnect them properly.
Tip 4: Connect the Wiring Harness
The wiring harness adapter is a crucial component when installing a new car stereo. It will allow you to connect the stereo to your vehicle’s existing wiring without the need for any cutting or splicing. Simply match the color-coded wires from the stereo to the wiring harness adapter, and use crimp connectors or electrical tape to secure the connections.
Tip 5: Secure the New Stereo in Place
Once the wiring is connected, slide the KR615 car stereo into the dash opening and secure it in place using the screws provided in the dash kit. Make sure the stereo is snug and secure to prevent any rattling or movement while driving. Reattach the trim pieces around the stereo to give it a clean and polished look.
FAQs
1. Can I install the KR615 car stereo myself, or do I need professional help?
Installing the KR615 car stereo can be done as a DIY project if you have the necessary tools and knowledge. However, if you are not comfortable working with car electronics, it is best to seek professional help to avoid any damage to your vehicle.
2. Will the KR615 car stereo fit in all car models?
The KR615 car stereo is designed to fit most car models, but it is essential to check compatibility with your specific vehicle make and model before making a purchase.
3. Do I need any additional accessories to install the KR615 car stereo?
In addition to the necessary tools, you may need a dash kit and a wiring harness adapter that are compatible with your vehicle’s make and model to install the KR615 car stereo properly.
4. Can I retain steering wheel controls with the KR615 car stereo?
Some KR615 car stereo models come with steering wheel control compatibility. Make sure to check the product specifications or consult with the manufacturer to see if this feature is available.
5. How long does it take to install the KR615 car stereo?
The installation process can vary depending on your experience level and the complexity of your vehicle’s system. On average, it takes about 1-2 hours to install the KR615 car stereo properly.
Installing the KR615 car stereo can enhance your driving experience with its advanced features and superior audio quality. By following these top 5 tips and paying attention to the installation process, you can enjoy seamless music and audio playback in your vehicle.
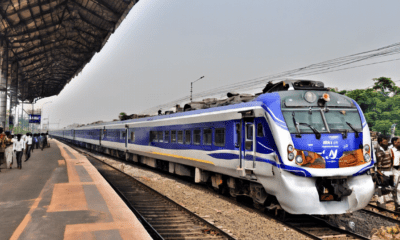

Exploring the Vijayawada Junction to Mgr Chennai Central Vande Bharat Express Route
The Vijayawada Junction to Mgr Chennai Central route on the Vande Bharat Express is a journey that offers passengers a...


West Indies Academy vs Trinidad and Tobago Full Match Scorecard
Cricket fans around the world often find themselves looking for detailed information and statistics from matches played between West Indies...


Player Stats: Lakers vs New Orleans Pelicans Game
Both the Los Angeles Lakers and the New Orleans Pelicans are standout teams in the NBA, boasting some of the...


Unveiling the Indian Air Force’s New Ensign
In a momentous occasion for the Indian Air Force (IAF), a new ensign was unveiled earlier this year, marking a...


Exploring Lee Han-Byeol: A Rising Star in Entertainment
Lee Han-Byeol is a name that has been generating buzz in the entertainment industry recently. This rising star has been...